
ZIPPER TRIM CONSTRUCTION 3 is a bit more involved but can produce good results once you get the hang of it.
First, sew the collar to the body assembly (only the collar, not the collar facing), matching front edges and center back.

Place the long strip of zipper trim (piece I) along center front, right sides together and matching center and bottom edges.
The zipper trim should overhang the collar/collar facing seam line by about 1"; cut off any excess.
Sew the zipper trim to the body ⅜" from edge.

Press the zipper trim toward center (the long way).
OPTIONAL: We recommend quickly hand-stitching the front edge and sewn zipper trim together, as the cotton lycra does tend to curl, and the next step requires folding over it and pressing. It doesn't need to be anything fancy or pretty, just enough to keep the edges from curling/rolling/etc. and messing up your zipper trim later! (The zipper trim should have a nice, crisp, flat look, and ironing it over curled cotton lycra will ruin it.)

Fold the zipper trim (the long way) over division shirt front, turning the zipper trim under to the wrong side and leaving a ⅜" band along front center edges.
Press zipper trim along front center.

Cut the excess zipper tape off of the top of the invisible zipper and apply liquid fray preventer to the top of the zipper to prevent the zipper tape from unraveling.
 Unfold zipper trim and pin invisible zipper on trim so that zipper teeth are just inside the pressed crease (that is, 1" from the open edge of the zipper trim!) and the top of the zipper is about ½" below the top of the collar.
Sew the invisible zipper to the zipper trim, extending the stitching ONLY ½" onto the collar (leaving the remainder 1" or so of the zipper hanging free). Reinforce the stitching at the top of the stitch line.
 Using your all-purpose foot, sew a horizontal stitch across the zipper tape to further secure it to the collar.
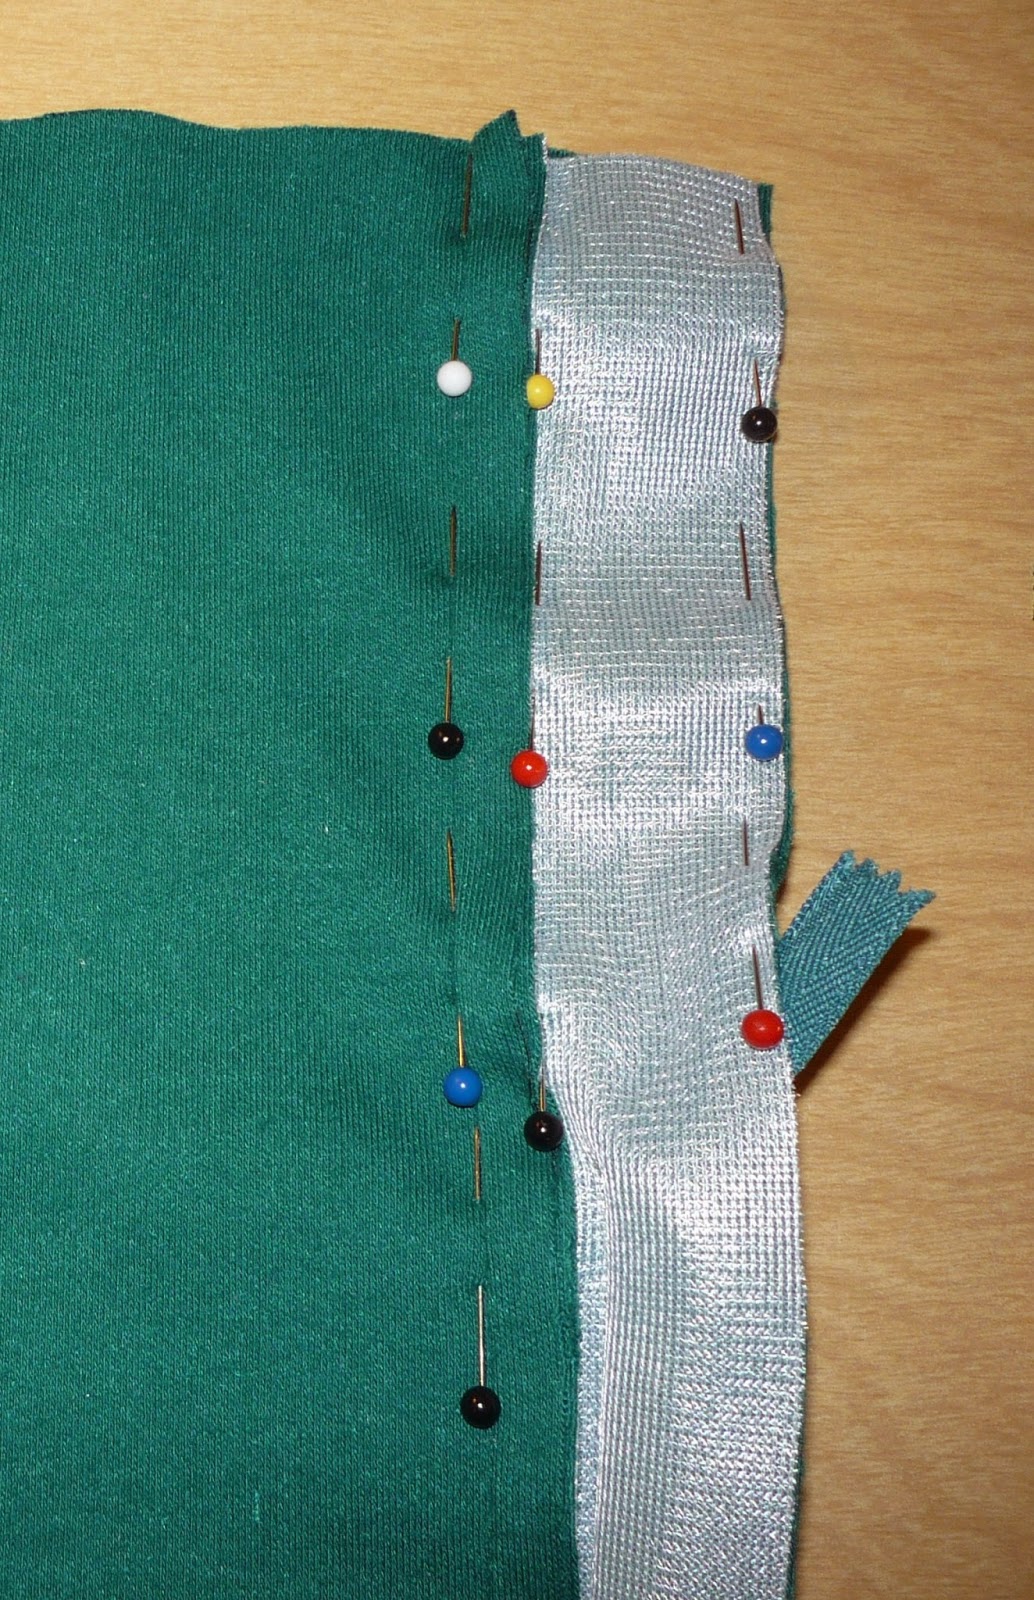 Using an edging/piping/zipper foot on your sewing machine, pin and sew the remainder of the zipper trim together beneath the zipper at the bottom of the division shirt.
Close the zipper and pin the underside of the zipper trim securely to the front.

 Open the zipper and "stitch in the ditch" through all layers along the division shirt front/zipper trim seam line (⅜" from center), securing both the underside of the zipper trim and the zipper tape.
NOTE: Take care to not sew onto the zipper tape at the top, where it is left free! You may wish to do two separate "stitch in the ditch" operations: one for the top inch or so with the free zipper tape folded out of the way, and one for the remainder of the zipper trim.
Repeat for the other side.
Close the zipper again.
The zipper trim should be crisp, edges flush, and the zipper completely obscured underneath.

Hand sew two hook-and-eye closures to the underside of the zipper trim/collar facing at the top, where the zipper is left hanging free.

Fold the collar facing down on the pressed crease.
Sew the collar facing to the body assembly along previous stitching line as far as possible.

"Stitch in the ditch" from the right side along the centermost 2" or so of the collar/body seam line to secure the remainder of the collar facing, taking care to not stitch onto the zipper trim.

Your finished zipper trim assembly should now look like this:

ZIPPER TRIM CONSTRUCTION 4 is identical to construction 3, except that the uppermost portion of the invisible zipper left hanging free is hand-tacked to the collar facing and/or zipper trim.
This secures the top of the zipper tape in the event that the wearer wishes to have the option of wearing the division shirt open or closed; the zipper tape is more securely fastened and not as unsightly in the open position.
Construction 4 would be our second choice, after Construction 1; construction 4, while not as pretty as the actual "open collar version" when worn open, nevertheless provides the most functional versatility.
 |
| First Contact |
It's basically a variation of Captain Picard's open division shirt from the climax of First Contact.
PREVIOUS: Tutorial, part 4a - Collar to Body, Zipper Trim methods 1 and 2
NEXT: Tutorial, part 4c - Open Collar
PREVIOUS: Tutorial, part 4a - Collar to Body, Zipper Trim methods 1 and 2
NEXT: Tutorial, part 4c - Open Collar
No comments:
Post a Comment